Animation and timing
Reveal the right information at the right moment. Control steps, effects, timing and reusable styles.
The Animator
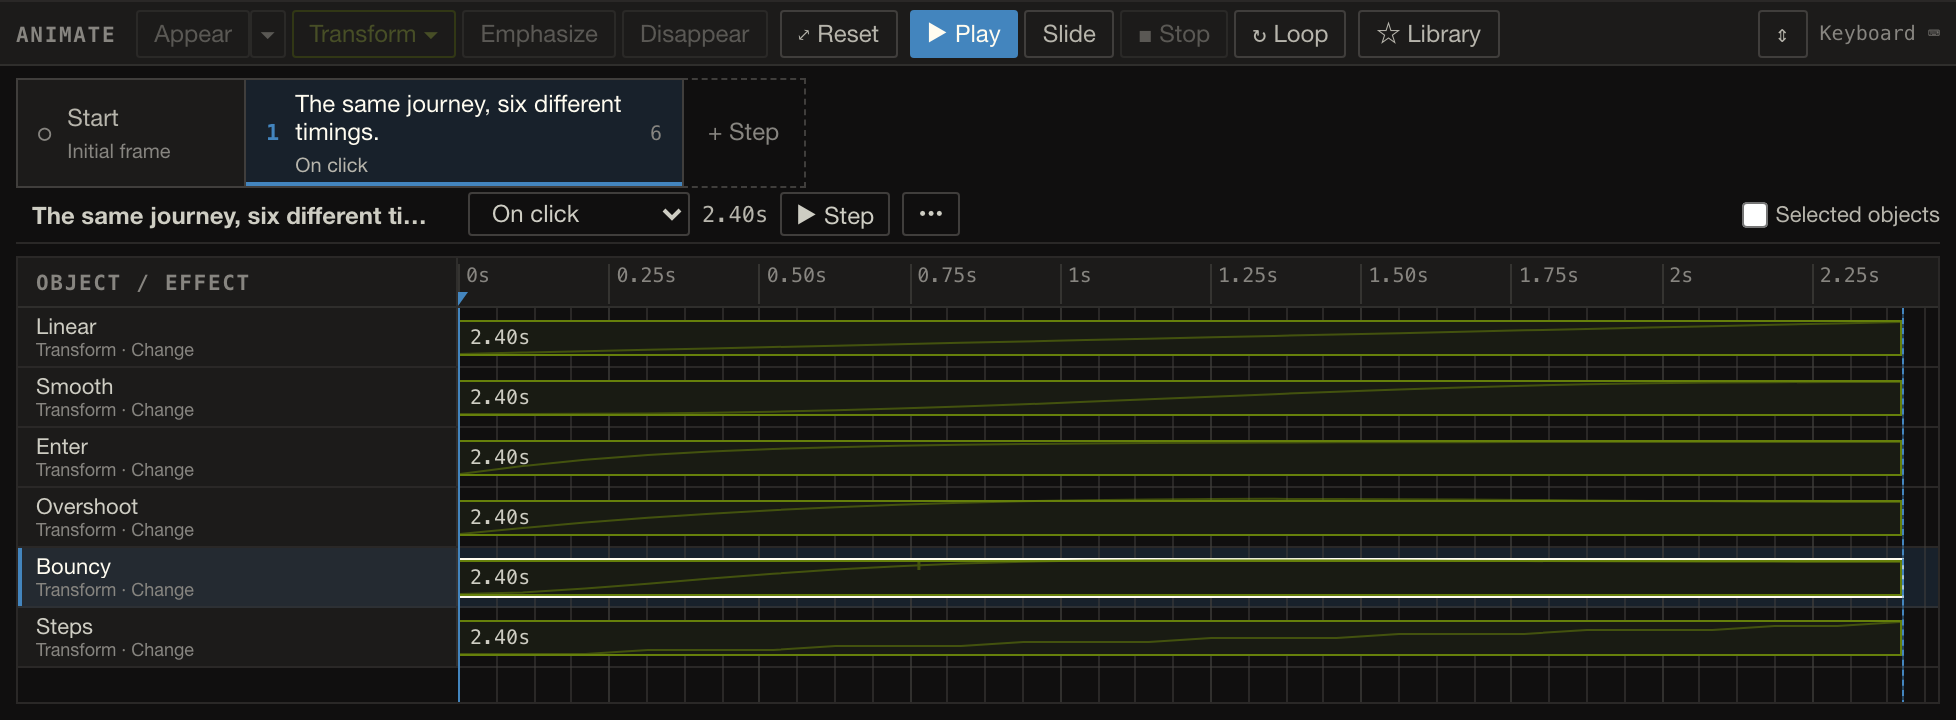
Animate ⏱ opens a resizable dock with a named step strip, millisecond ruler, and timing lanes. Object and semantic-part names stay readable in the fixed left column, even for short effects. Select a lane to select and outline its stage target. Hovering a lane outlines the exact object or plot parts. Selecting an object identifies its effects in the current step.
To animate something, select it on the stage (Ctrl/Cmd+click drills to a plot part), then use:
- Appear / Ctrl+Shift+A — add an entrance.
- Transform ▾ — one action, three ways: Change (Ctrl+Shift+C) shapes a new state of the object at this step; Ghost… (Ctrl+Alt+G) creates copies that transform independently; Become (B) turns the object into another one. See Transforms.
- Emphasize — add a highlight.
- Disappear / Ctrl+Shift+D — add an exit.
Flux chooses an entrance suited to the object: text rises, shapes pop, and lines draw on. Adding another effect keeps the existing ones. Effects on the same target start after its existing effects by default.
Auto-animate builds a plot in four phases: axes and colour key, gridlines, data, then legend and annotations. Lines draw on, bars grow from their baseline, and points stagger in. For multi-panel plots, choose panel by panel to run that sequence for each panel, with the title first and shared legend last.
See an entrance
Use Fade for a quiet reveal, Pop to bring attention to a shape, or Wipe to uncover it across the frame. In the slide below, from the Flux film, sample means pop in and a curve draws on.

Entrances build the argument. A sample lights up in the population, its five dots fly down, and their mean pops in below: one sample, then two, then a cascade of a hundred. The normal curve then draws on over the pile. Simulated samples from a skewed Gamma population. Use the next-step arrow to play; reset to watch again. Reduced motion shows each finished step.
Select and arrange effects
Drag a box from empty grid space to select several effects. Shift or Ctrl/Cmd adds to the selection; Escape cancels. Click empty space to clear it. Selecting effects does not change their timing.
| To… | Do this |
|---|---|
| Change when an effect starts | Drag its timing bar |
| Change its duration | Drag the bar’s right edge |
| Reorder lanes | Drag a bar vertically |
| Move an effect to another step | Drag it onto that step; hold Alt to copy |
| Select several lanes | Shift or Ctrl/Cmd+click; Ctrl/Cmd+A selects the step’s effects |
| Group or ungroup | Ctrl/Cmd+G or Ctrl/Cmd+Shift+G |
| Duplicate selected effects | Ctrl/Cmd+D |
| Zoom or fit the timeline | Ctrl/Cmd+wheel or fit ⟲ |
Groups, scrolling and snapping while you drag
Groups collapse without changing timing. Double-click a group name to rename it; drag its span to retime or move the whole group. A selection box that crosses a collapsed group selects its members. Scroll while drawing the box, or hold near the grid edge to scroll. Right-click a lane for grouping, duplication and moves to named steps.
The ruler and grid fill the visible time axis at every zoom. While you drag, a guide follows the moving edge. It spans the ruler when the edge snaps to another effect or a grid line. Every visible major and minor grid line is a snap target; a 50 ms grid also catches drags between them. Resizing snaps the effect’s end. A single selected effect shows its start and end across all lanes.
Align starts and ends


On macOS, Alt is Option (⌥). Focus the Animator before using these keys.
Select effects and press Alt+A to align their starts, or Alt+D to align their ends. Their durations stay the same. Add Shift to resize instead, keeping the opposite edge fixed. These actions are also available on a bar’s right-click menu.
Press the shortcut again to try the next alignment:
- If the selected edges differ, the first press aligns them to their own earliest start or latest end.
- Later presses use each lane above the selection, nearest first. A guide and ruler label identify the target.
- After the last choice, the effects return to their original timing. One Undo also reverses the entire cycle.
Moving a start detaches its Follow timing link, as dragging does. A toast names the former source lane.
Align tracks from the command line or an agent
align-tracks performs the same edit from the CLI and MCP. Name a reference track, or give an exact time in milliseconds:
flux align-tracks talk slide1 --tracks e3,e4,e5 --edge end --to rect2
flux align-tracks talk slide1 --tracks e3,e4 --edge start --to 250 --resizeSee the slide command reference for more commands.
Inherit an effect’s animation
Use Inherit animation to copy another effect’s settings:
- Select the effects you want to change.
- Hold Ctrl+Alt (⌘+⌥ on macOS) and drag a bar onto the source lane.
- Release when Inherit from ‹name› appears. Hold Shift as you release to copy the start time too.
A dashed guide identifies the source. Release elsewhere or press Escape to cancel; Undo reverses the entire drop. You can also right-click a bar, choose Inherit animation from…, and click the source lane.
Inherit copies the source’s duration, easing or spring and stagger. Between two entrances (or two exits, or two transforms) the effect itself and its options come too — four pops become four rises. Across kinds only the timing travels, so an exit stays an exit. If the source uses an animation style, the effects link to that style instead and follow its later edits. What the effects animate, their transform endpoints, links, groups and on/off state never change. Inherit does not copy timing between video commands and animation effects. inherit-track does the same from the CLI and MCP:
flux inherit-track talk slide1 --from rect2 --to e3,e4,e5,e6 [--include-start]Animate plot parts from the X-ray
The X-ray (Alt+R) lists a plot’s named parts as a tree, and you can animate from it:
- Select one plot, or several, and press Alt+R. A multi-plot X-ray lists the parts every plot shares.
- Pick the rows you want: Shift+click a run, Ctrl/Cmd+click to toggle a row, Ctrl/Cmd+A for all.
- Press M and choose Appear, Emphasize, Disappear or Change.
Appear, Emphasize and Disappear give each picked part its own effect on the current step, ready to retime. Change selects the plots that own the parts; edits to part styles are captured in each plot’s Change. Picking the same part through both a common row and its plot’s own tree creates one effect, not two. With Show hidden off, parts that have already disappeared are left untouched by visibility and animation actions on common rows.
The Animation inspector and keyboard
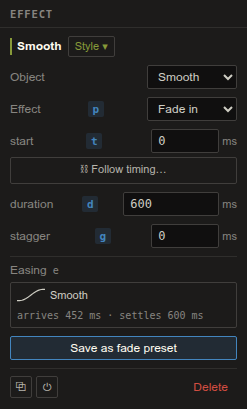
The Animation inspector edits the selected effects’ target, part, effect, start, duration, easing, stagger and any effect-specific controls. When the selected effects disagree, a timing field stays blank until you set one shared value. Choose a new target or part to repair a missing binding. An issue banner lists missing targets, unmatched parts, unsupported effects and conflicting overlaps; click an issue to inspect its track. The Easing field shows the timing curve and opens its editor. Library holds reusable presets and multi-track templates.
Keyboard commands belong to the focused surface:
- In the Animator or the Animation inspector: Delete removes effects, the arrow keys move between steps and lanes, Alt+←/→ retimes starts, Alt+Shift+←/→ adjusts durations, and Alt+A / Alt+D align starts / ends. P focuses Effect/Action, D Duration, T Start/Offset, G Stagger, and E opens Easing.
- On the canvas: Delete removes objects and the arrow keys move them.
- In a text field: keys keep their normal editing behaviour.
Ctrl/Cmd+Z undoes one edit or gesture wherever you are.
Easing and springs

One easing, hundreds of moves. Every spike mark travels to its histogram bin with Smooth easing: it speeds up, then settles. Because all 346 marks share the curve, the rearrangement reads as one gesture. Simulated spike trains. Use the next-step arrow to play; reset to watch again. Reduced motion shows each finished step.
Select an effect and click Easing, or press E while the Animator has focus. The field shows the curve, when the motion first arrives at 90% of its travel, and when it settles. A faint curve inside each timeline bar shows the same timing; springs also have an arrival tick.
Choose a tile from Ease, Overshoot, Spring, or Discrete. Hover a tile for one preview pass; reduced motion keeps that preview still. Focus a group and press 1–9 to choose within it. Bouncy is a spring with overshoot and a settling tail. Adjust Bounce to change its character and Velocity to change its starting speed. For a Discrete curve, Steps sets the count from 1 to 60. The overshoot …% readout reports how far the curve passes its endpoint; data and other bounded channels still stay within their limits.
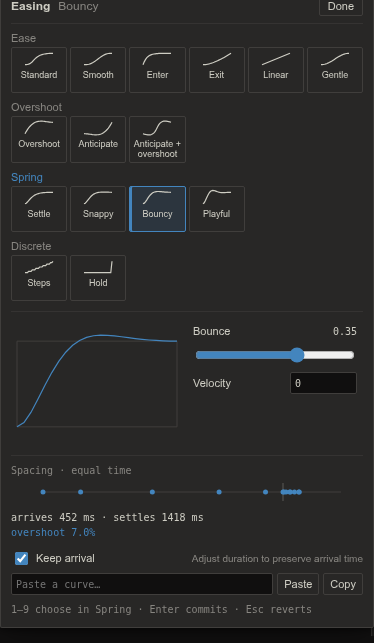
Keep arrival starts checked. It adjusts each selected effect’s duration to preserve its arrival time as you change the curve, within 150–4000 ms. A 600 ms Smooth move becomes about 1418 ms with Bouncy: the motion arrives at the same time and the bar grows to hold the settling tail. Turn Keep arrival off to keep the bar’s duration instead. A follower anchored to the bar’s end waits until settling finishes.
The graph’s handles edit a custom bezier. Arrow keys move a focused handle by 0.01; Shift+arrow moves it by 0.1. The numeric fields let you enter exact values. Existing influence curves keep their handles horizontal; dragging vertically converts them to a free bezier. The spacing chart shows 13 positions at equal times: close dots mean slower motion.
Use the Paste a curve… field and Paste button, or Ctrl+V in the editor, to enter names such as bouncy, or strings such as spring(0.35, v=2), cubic-bezier(.2,1.4,.4,1) and steps(8). Copy copies the current curve. Invalid text shows an error without changing the effect. Different selected curves show Mixed; choosing a curve applies to all selected effects as one edit. Enter, Done, or clicking outside commits; Esc restores the opening curve and duration.
Data never overshoots. Box movement and camera motion can spring past their destinations; data values, count-up text, plot views, opacity and reveals stay within their valid range. PowerPoint uses Morph’s own ease; Flux’s curve is retained in Flux playback and HTML exports.
Right-click a timeline bar and choose Copy timing, then select other effects and choose Paste timing. This copies duration, curve and stagger together as one undoable edit. It leaves their targets, start times and linked style identities in place.
Animation styles
Deck animation styles share an effect’s preset, parameters, duration, easing, stagger, arc and start. A linked effect inherits absent fields; changing a field on that effect overrides the style for that field. Editing the style updates every inheriting effect. An effect links only to a style of its own kind (appearance, transform or video command); linking gives it the style’s preset, and changing the style’s preset changes it on every linked effect. Detaching a style, or deleting it, keeps each effect’s current settings. Saved slide presets carry the styles they use, and insertion reuses an existing style with the same name and family.
Select an effect and open Style ▾ in the Animation inspector. Choose a deck style of the same family, or Save as new style… and enter a name. Selecting several effects links them all; a selection spanning different families explains why linking is unavailable.
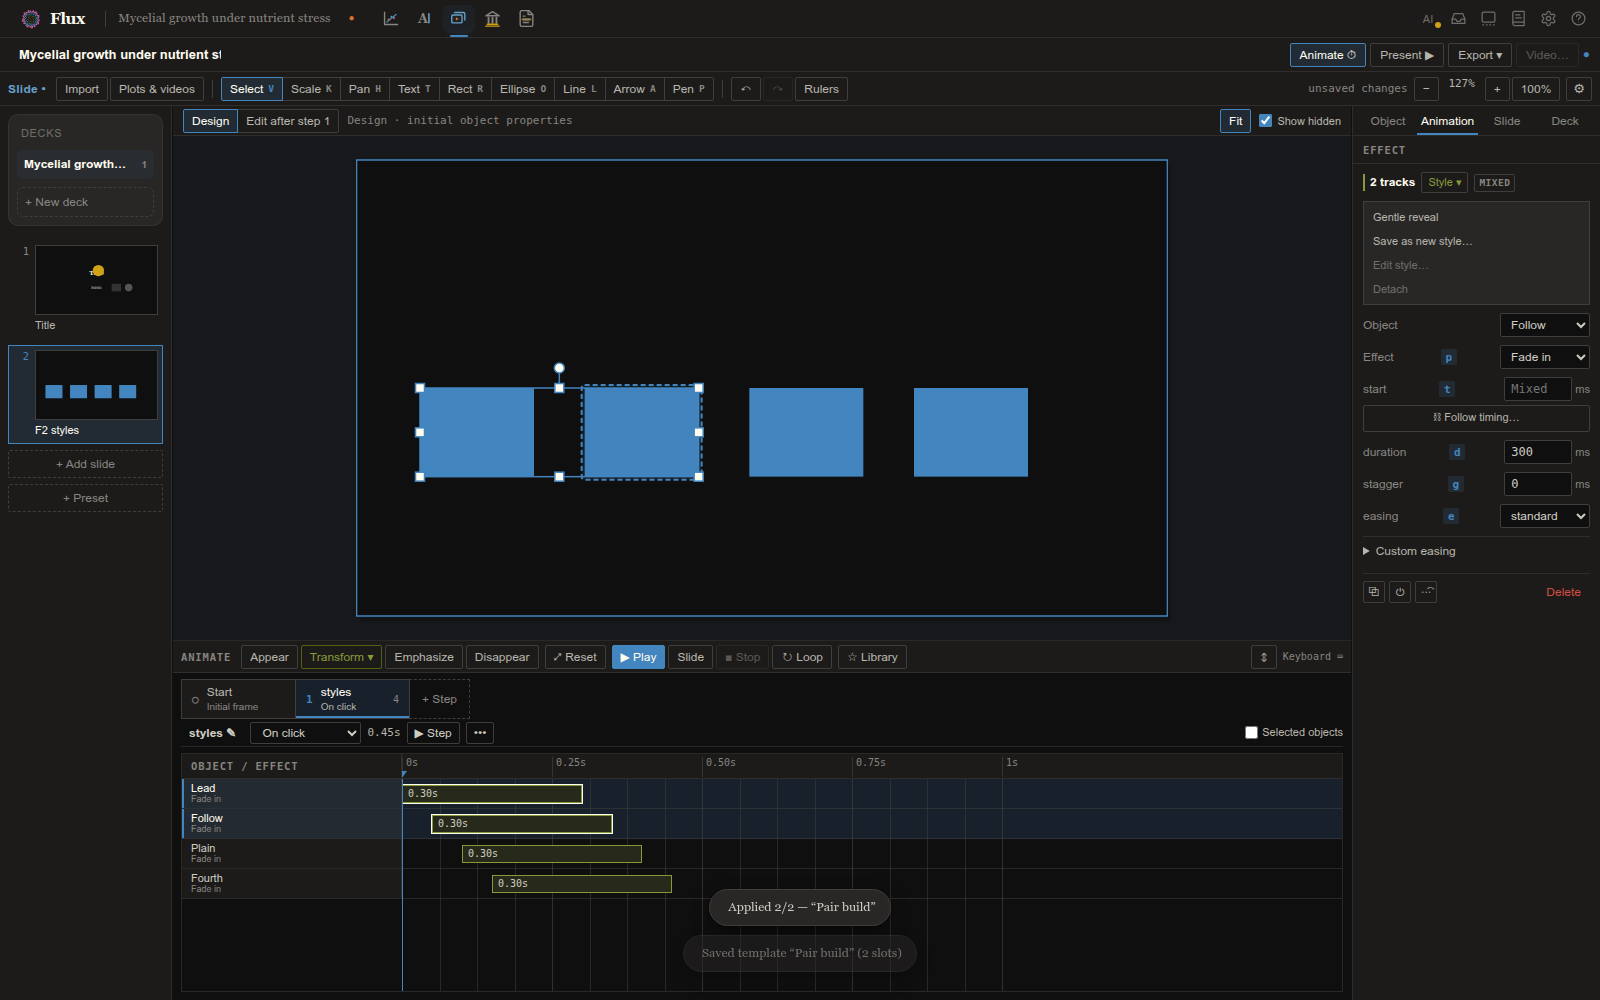
A local edit shows override beside ↺ use style. Reset removes that field’s override so it follows the style again. Setting stagger to zero turns it off for this effect. Setting both custom influence values to zero in the editor resets the timing field to its style or preset default. A stored zero-influence record can explicitly suppress inherited influence, but the editor’s zero action restores inheritance. Edit style… opens the shared fields under an Editing style ‹name› · N tracks banner; Back to effect returns to local edits. Detach keeps the current settings as independent values.
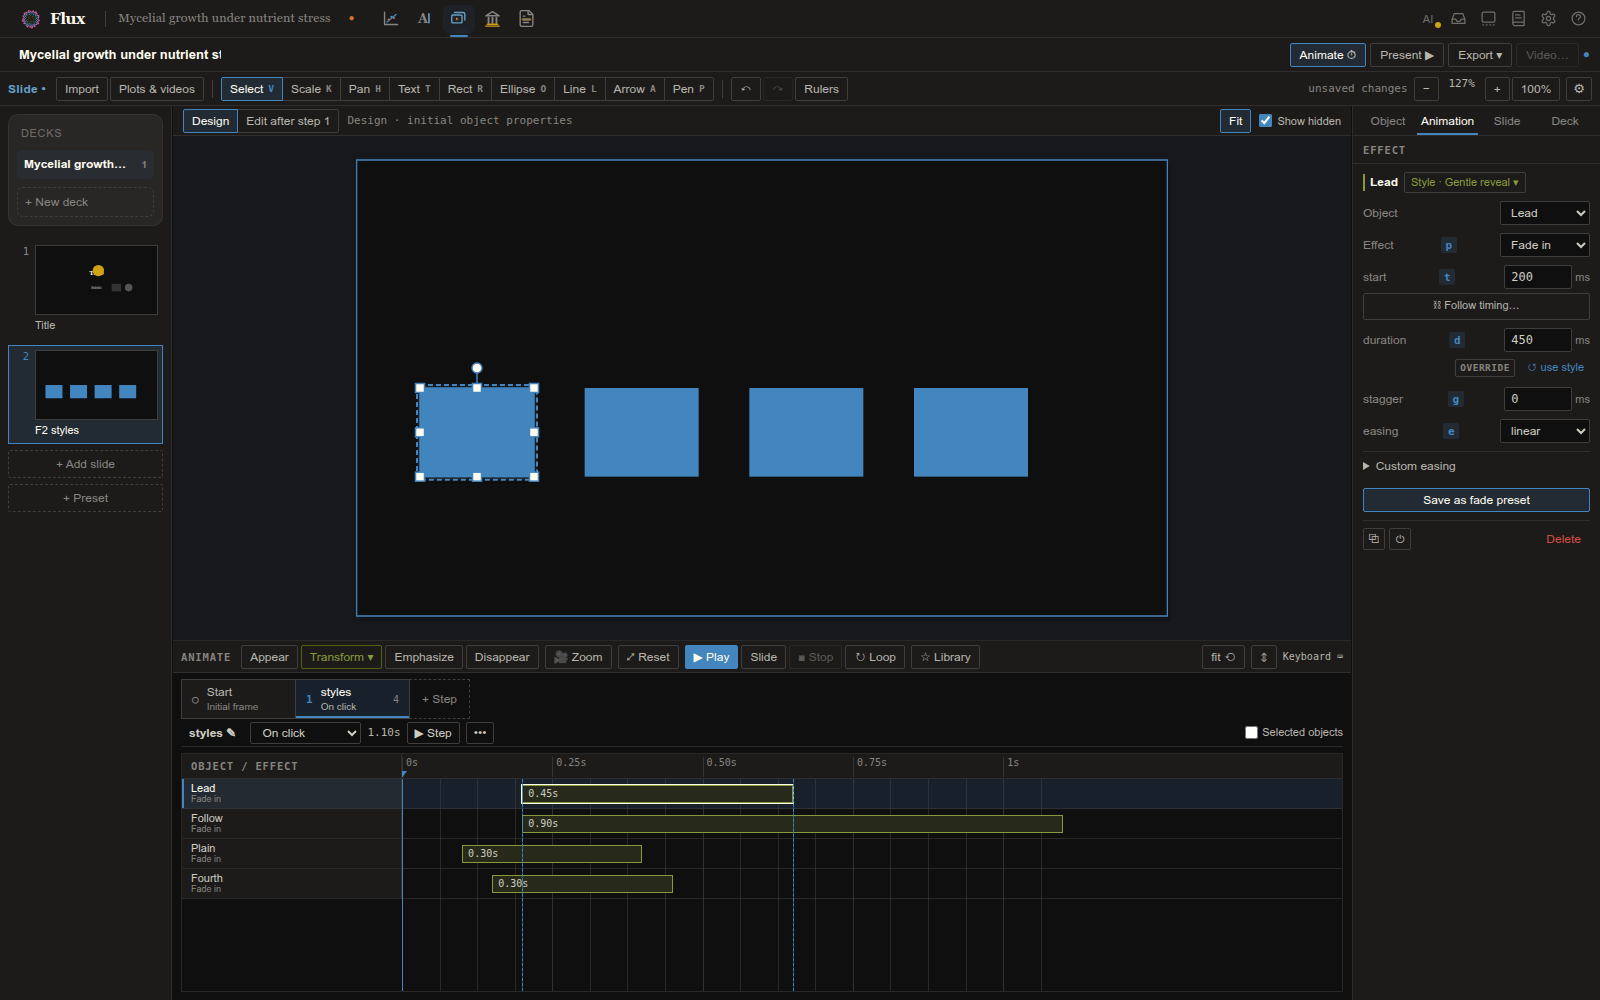
Right-click a timing bar and choose Animate like…, then click an object on the canvas. The picker’s outline and hover show which object you are on and name its effect in this step; one click commits. Its effect in this step supplies the style. If it has no style, Flux creates Like ‹object label› and links both effects. A multi-selection links in bulk; incompatible families are reported. In the X-ray, 6 arms the same pick for the selected objects or parts. Esc cancels.
In the animation Library, clicking a preset’s name still applies a copy of it. Its as a linked style action instead creates a deck style from that preset and links the effects it is applied to. Slide presets include the deck styles they use and restore their links when inserted.
Follow timing
Hold Ctrl/Cmd and drag a bar’s left edge onto another bar’s start or end. The magnet guide turns solid; releasing creates a timing anchor with zero offset. A link glyph marks the follower. Retiming the source moves its followers live, including the source’s stagger tail. You can also choose ⛓ Follow timing… in the inspector and select a lane’s start or end.
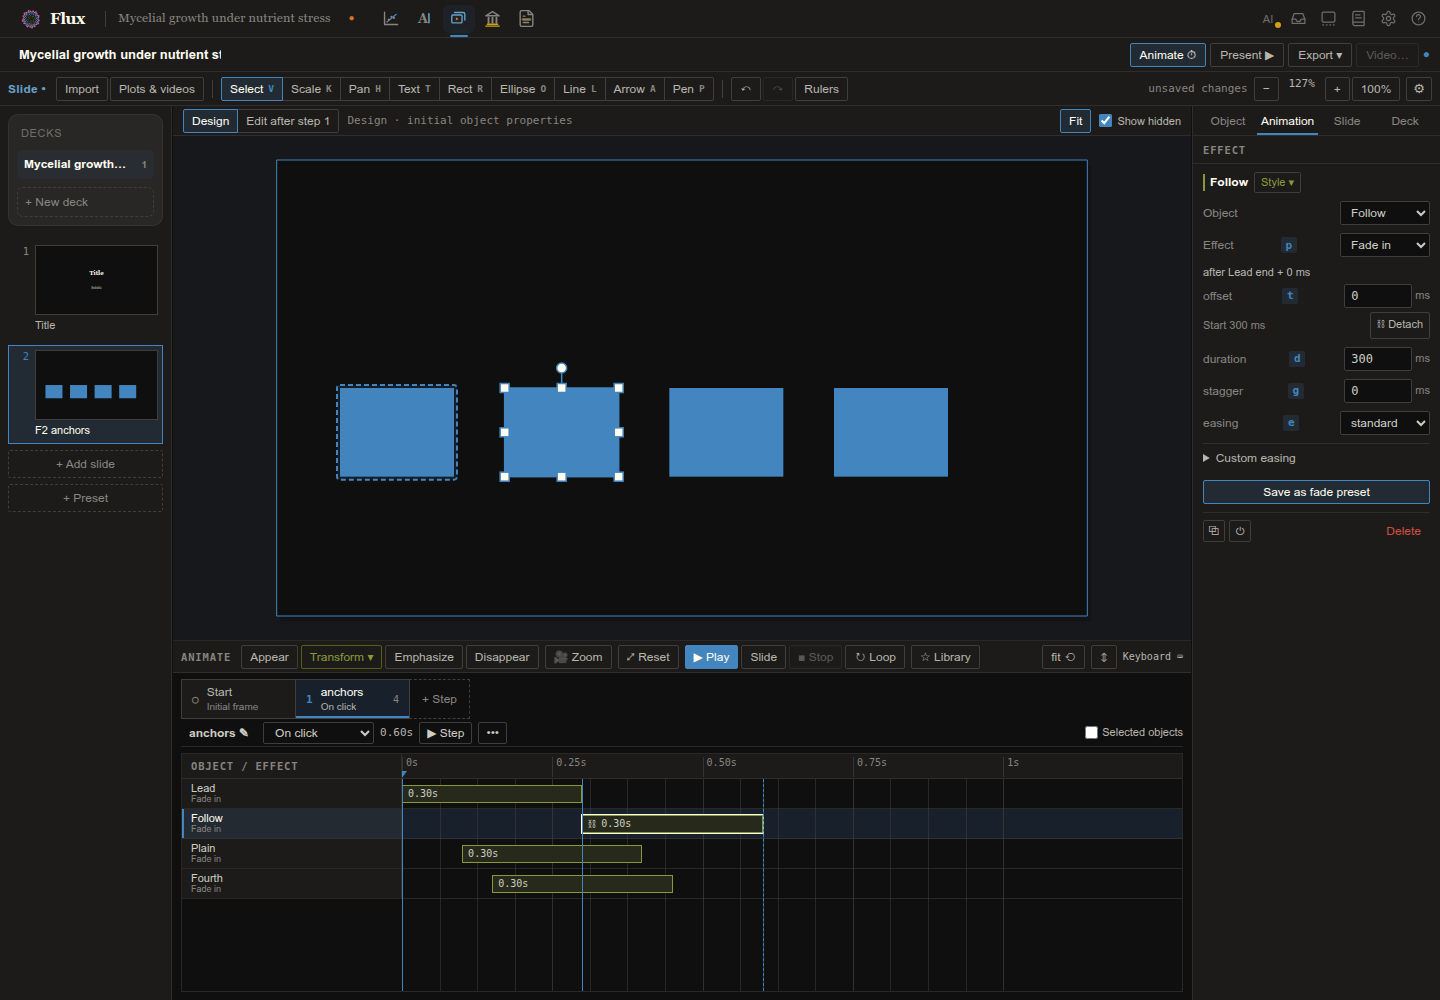
An anchored start row reads after ‹lane› end + 0 ms and displays the resolved start. Its primary input edits the offset. Choose ⛓ Detach to retain the resolved start as absolute milliseconds. A plain bar drag also detaches and names the former lane in a toast; one Undo restores the whole gesture. Missing targets, cross-step references and cycles show the compiler’s issue text with the stored start as fallback.
Animation styles and timing anchors are also available from the CLI and MCP, through anim-style, animate-like and set-track:
flux anim-style create talk --name "Gentle reveal" --family appearance \
  --preset fade --duration 400
flux set-track talk slide1 effect1 --style STYLE_ID
flux animate-like talk slide1 --from effect1 --to effect2,effect3
flux set-track talk slide1 effect2 --anchor effect1:end:50The last command starts effect2 50 ms after effect1 ends, including its stagger tail. Retiming effect1 moves effect2 automatically. Anchors stay within one step; self-links and cycles are refused. A removed anchor target leaves a visible issue and uses the follower’s stored start. set-track --start adjusts an anchored effect’s offset; --no-anchor keeps its current resolved start. --no-style detaches its style. A start cascade adjusts anchor offsets; a duration cascade writes local overrides on linked effects.
Successive appearance effects follow the prior effect’s end. Auto-animate links a plot’s Data-phase geometry to the points’ start, plus half of the original stagger delay.
Playback and inspection
Step plays only the selected step. Play starts from that step and continues through the slide; Slide plays the whole slide. Space toggles play/pause and Stop returns to editing. The playhead follows the actual player clock. Drag the ruler to inspect a precise time without editing the document or changing the edit destination. Playback retains the last frame for inspection. Loop repeats the chosen playback range. Editing a property cancels the old preview so the next preview uses the updated document. Use Present for manual click-by-click rehearsal.
Appearances
The preset menu covers entrances (fade, fadeRise, popIn, growBaseline, drawOn, writeOn), exits (fadeOut, popOut, drawOff, wipeOut), emphasis (highlight, dim), stagger — members of a group or points of a series arrive in sequence, ordered by position or index, from either end or the center — and countUp, which tweens a number in a text element (“n = 1,247” counts up in place). Draw-on/off expose full trim path control (direction, anchor, single/both-ends/middle-out, partial windows), and wipes pick their direction.
By sets the stagger order: order (target order), x → or y ↑ (data position), value (each part’s own value — a hexagon’s mean, a cell’s value, a bar’s height — low to high), count (observations per hexagon) or data index (the generator’s index). The order comes from the plot’s data, so a hexmatrix can fill from its emptiest hexagon to its fullest.
Use Stagger → Each for the delay between ranks, or Total for the time between the first and last item starting. Switching modes preserves the current span. From → Random uses a repeatable order; edit Seed or click ↻ to reshuffle (one Undo restores it). The distribution curve controls how densely starts fall within the span: an ease-out curve starts widely spaced, then packs later starts together. Springs are clamped to the span. Center and Edges keep symmetric pairs together; if every item ties, Total uses input order. A single target has no stagger tail.
flux set-track talk slide1 effect1 --stagger-total 800 --stagger-curve enter \
  --stagger-from random --seed 42
flux set-track talk slide1 effect1 --stagger-each 30
flux set-track talk slide1 effect1 --stagger-each 30 --stagger-by countCascading tracks
Select several tracks and press Ctrl+Alt+C to open the same cascade popover that Figure uses for layout. Here it steps an animation value evenly across the selection: start, duration, per-item or total stagger, Arc, easing influence or Spring bounce. Spring bounce skips effects without a spring, and they do not use up a step. Five drawOn effects starting 120 ms apart take one gesture instead of five edits.